A review of the Prusa Mini+ Kit from a 3d printing newbie
It's been a very exciting week for me as I recently acquired my first ever 3d printer! Which, as you can tell from the title, is the Prusa Mini+ Kit. I considered getting the preassembled version of the Mini, but I know 3d printers require some level of maintenance and I figured that maintenance would be easier if I knew how everything went together to start with.
Assembly
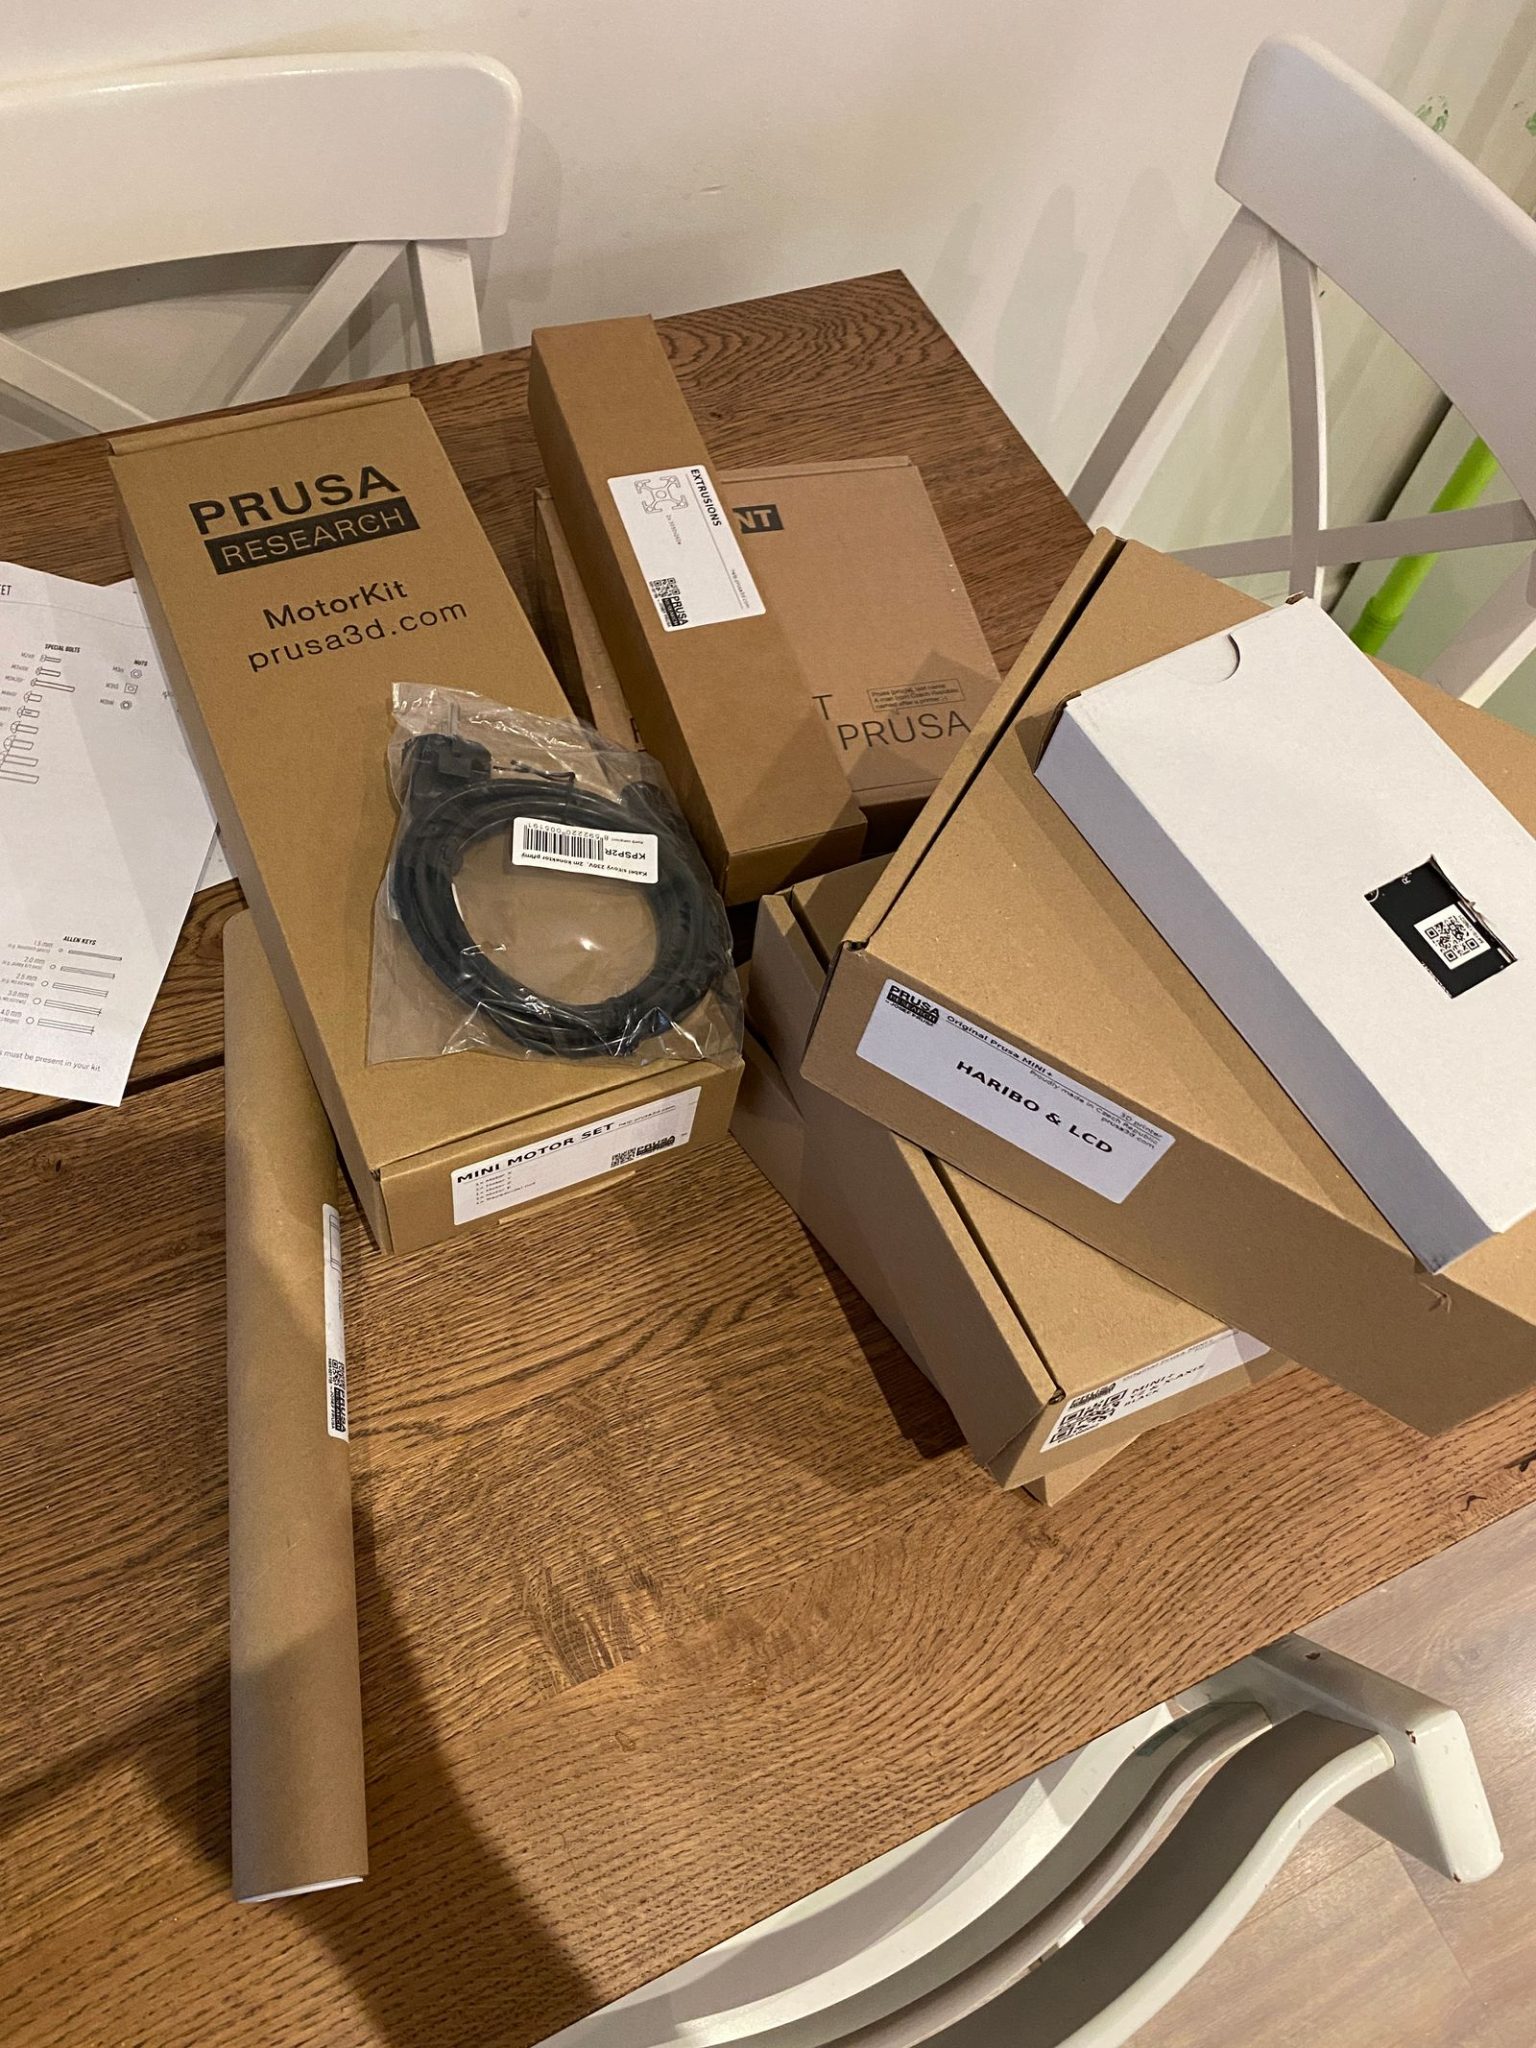
Putting the printer together wasn't very difficult, just slightly tedious at worst. It took me about 8 hours in total spread over a couple of evenings. Prusa do a great job of providing clear instructions, all the parts are clearly labelled. They even include every tool you need for the job right in the box. As long as you take your time and read the instructions before you start screwing things together, you shouldn't have any trouble.
Calibration
This is where I personally had some troubles. After I had finished assembling, I ran the self test and it failed on the z-index step. I checked everything was connected properly (it was) and tried a few things I found online but couldn't get past this test. Luckily Prusa have excellent 24/7 live chat support. After three hours working through a bunch of things with their online support we eventually figured out that my z-axis bearings (which the instructions say NOT to lube) had come from the factory dry and were causing too much resistance. We quickly lubed them up and five minutes later I was printing like a champ!
Printing
Well… almost. I was having a lot of trouble with underextrusion after the first layer. This was resolved by tweaking the default temperature from 210ºc to 230ºc. Once I did this I've had NOTHING but amazing perfect prints from my printer. I believe this is likely a problem with the hot end assembly, but despite taking it apart and reassembling a couple of times, I still haven't been able to get reliable prints at the recommended 210ºc. Luckily, changing the print temperature can be done in the slicer and it's one of those things that you just set and forget.
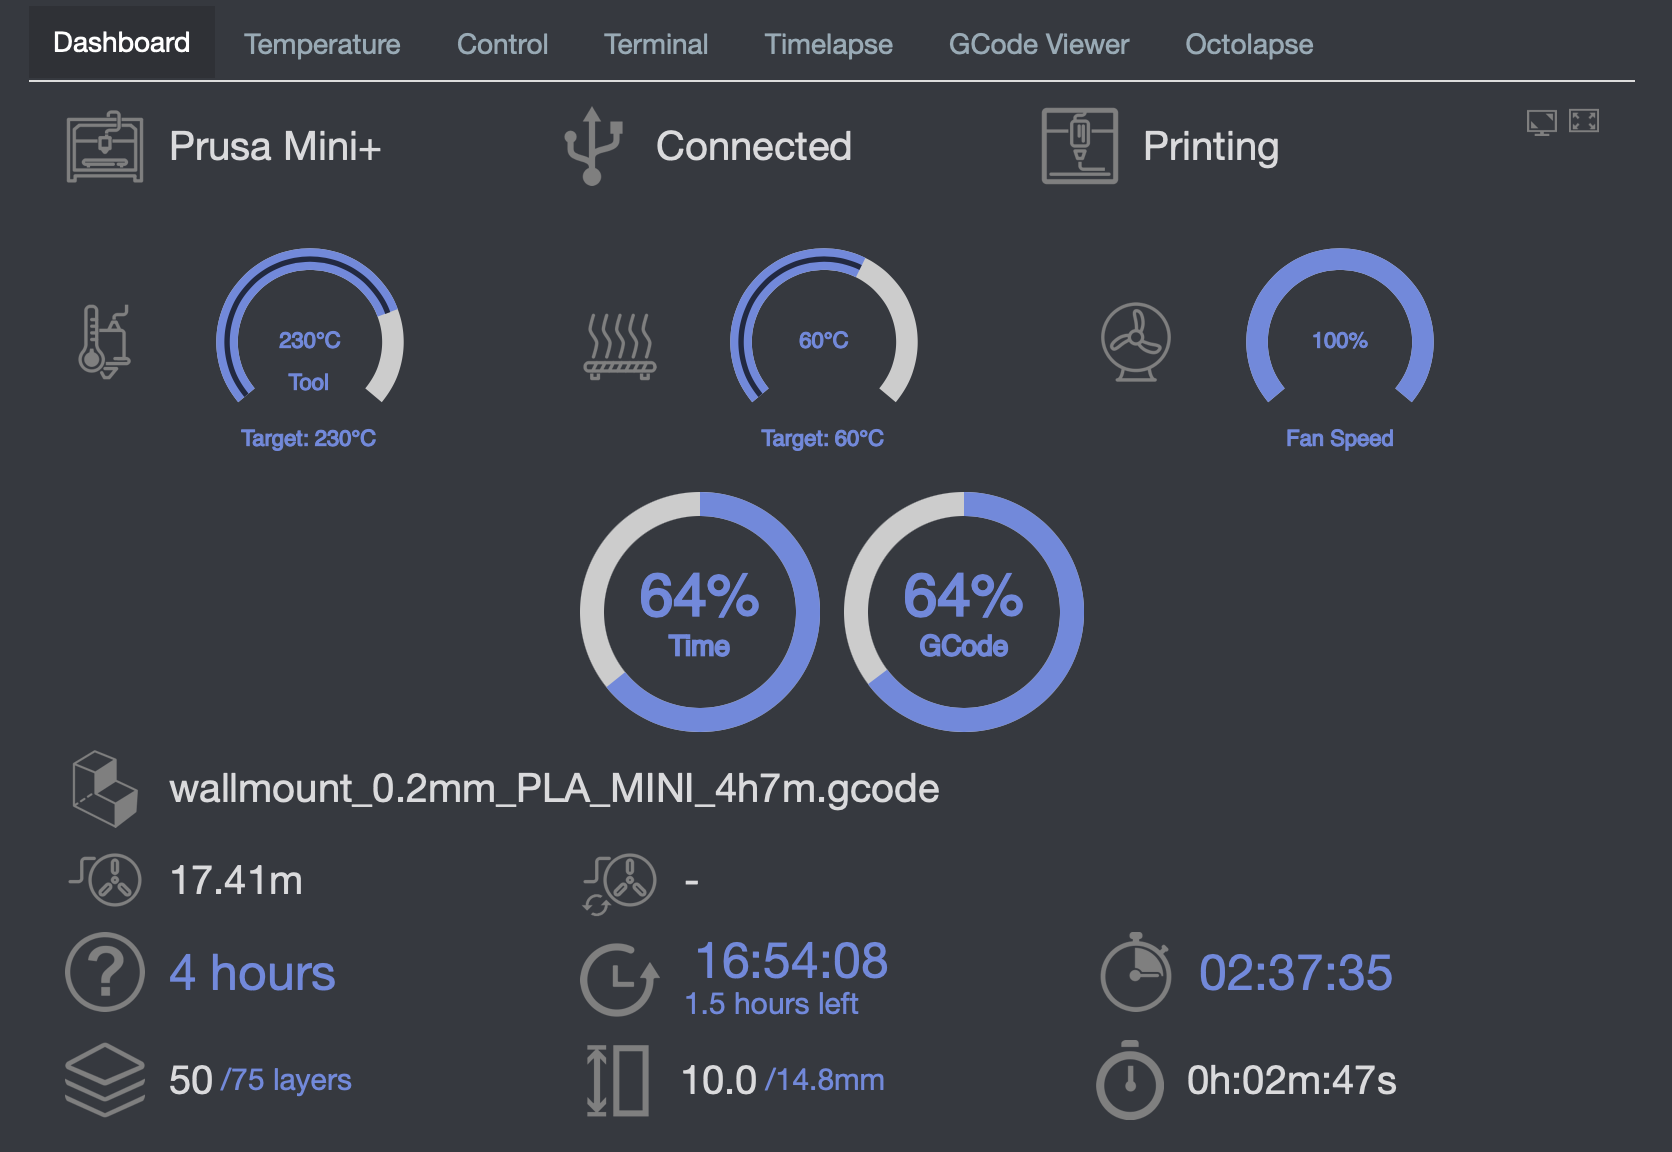
So we're good right? Not quite. I did have a few prints that would just spontaneously stop mid-print. After more chat with Prusa support they revealed that the USB stick that comes with the Prusa mini isn't great and can struggle with more complex files. Luckily, in the 15 weeks I spent waiting for the printer to arrive, I had setup a Raspberry Pi with Octoprint so it took me all of five minutes to plug that in and start printing wirelessly!
Since then, I've printed several models including a baby groot planter, benchy, nut and screw, case for a Yampad (macrokeyboard) and a bunch of modifications for the printer itself and I have been BLOWN AWAY with just how damn good these prints look.
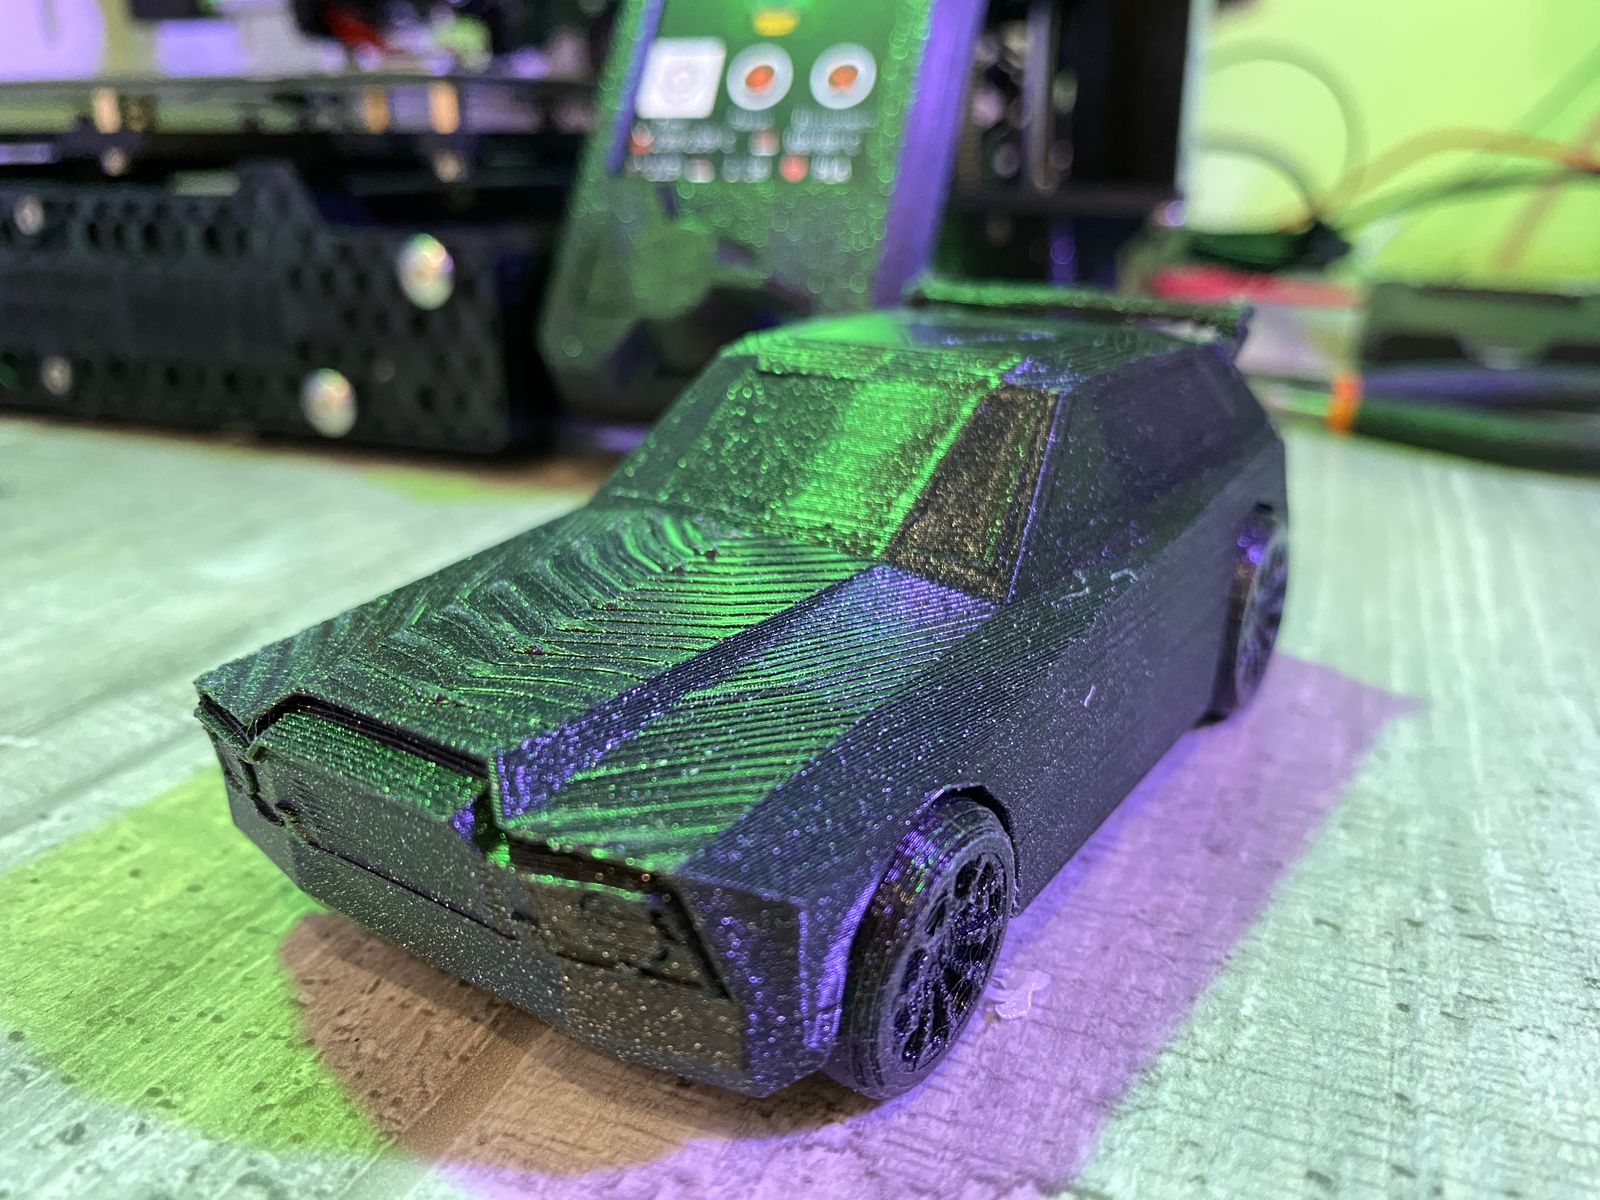
Maybe it's just because I've been using a decent filament (Prusament) but I've seen nothing but strong, well adhered, smooth prints out of the Prusa Mini and I am stoked with what I've been getting out of it. As a first time 3d printer user, this machine has far exceeded my expectations. I can say for sure, that I'm very happy with this purchase (so far at least!).
Modifying
As you read above, the first real modification I made was adding a Raspberry Pi 3b+ running Octoprint into the mix. This was always going to happen because I want to take some of those sweet, sweet timelapses using Octolapse but it arrived a little sooner than I had planned. Once I had it up and running with a mess of cables on my tiny desk, I knew I had to get that tidied up and so I printed a nice Pi case with an included mounting arm to keep things in their place.
Once I had that done, I started thinking about those timelapses again and I knew that I would need some good lighting in my dark little maker cupboard to get good pictures from the Raspberry Pi Camera module. Then I remembered I had some Pimoroni Mote LED strips hanging around that I had recently removed from another project and so I set about printing off an arm that attaches to the z-axis and then, armed with some hot glue, I bodged two mote strips onto the arm, ran a few cables and quickly had my LED arm up and running! Right now, I have to manually trigger the lights from the command line but I believe it can be controlled from Octoprint directly.
My next modification isn't to the printer itself, but certainly an improvement to my printing workflow. Right now I have my reels of filament resting on the free reel holder that came with the printer, it's fine, but a pain when I want to change reels and I don't have a ton of space for storage so I'm printing a nice wall mounted holder that can hold a few reels at once and I can feed straight from the roll without moving them. It also allows me to move the printer back, freeing up some space on my tiny little desk. Much better.
Last words
I really can't state enough, how happy I am with this printer. As a newbie to the world of 3d printing, I chose a Prusa because they have a great reputation for quality and customer support. In my limited experience so far, they've really delivered on that reputation and I'm very glad I spent a little extra money and went with a Prusa. I would LOVE to get something bigger, especially because I plan to print some cases for mechanical keyboards I've designed but living in a little Amsterdam apartment with three kids doesn't really make that practical for now. If you're a maker taking your first steps into the world of 3d printing, then I highly recommend you give the Prusa Mini a try!