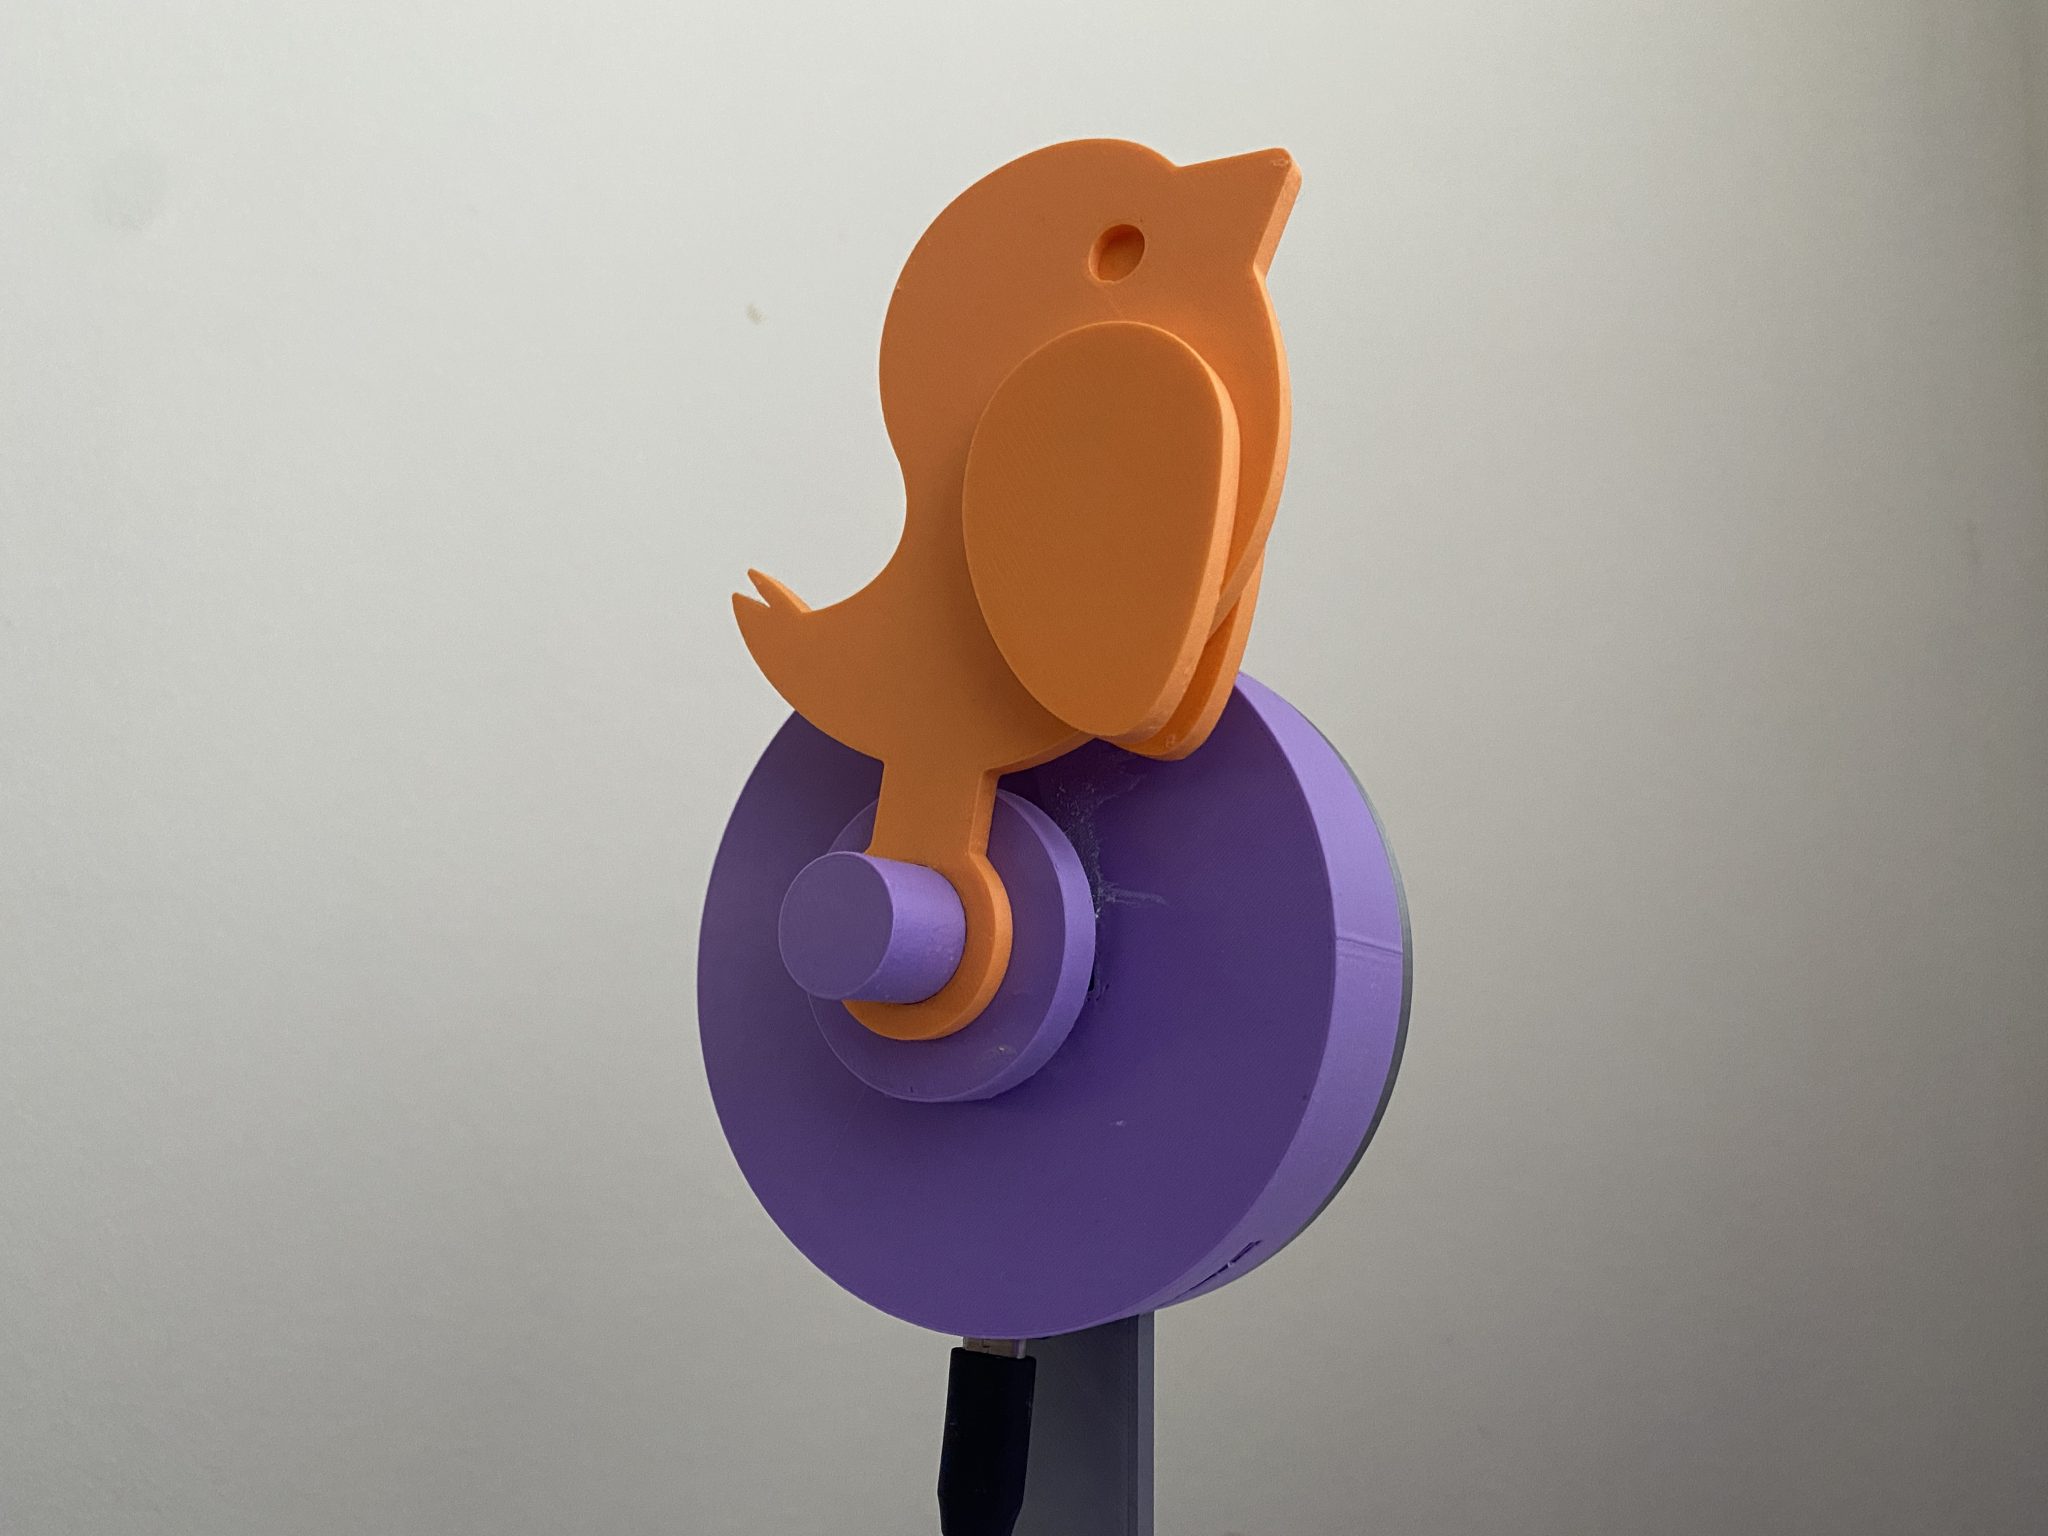
A couple of years back a couple of guys from Denmark released the Canairi, a simple Co2 sensor designed to let you know when it was time to ventilate your room. When I first saw it on Kickstarter I fell in love, but felt that there was room to make it better. Given the simplicity of the product I set about building my own “DIY” version and now I’m releasing the files so that you can build your own using off- the-shelf maker-grade electronics. I call my DIY version “The Birb”.
Note: this project is not endorsed or affiliated with Canairi in any way. All designs created for this are completely original and only inspired by Canairi.
Build list
You don’t need a huge amount of parts to build The Birb and aside from some kind of air quality sensor, everything else is optional. For the purpose of this build I have chosen to use supplies mostly from Adafruit. The main board used is a Feather Format ESP32-S2 based board from Unexpected Maker because it makes connecting I2C sensors quick and easy, and also includes wifi and charging circuits in case you want to power The Birb with a LiPo battery. I also use Adafruit Breakout boards featuring Stemma QT / Qwiic adapters for quick and easy connectivity and future flexibility.
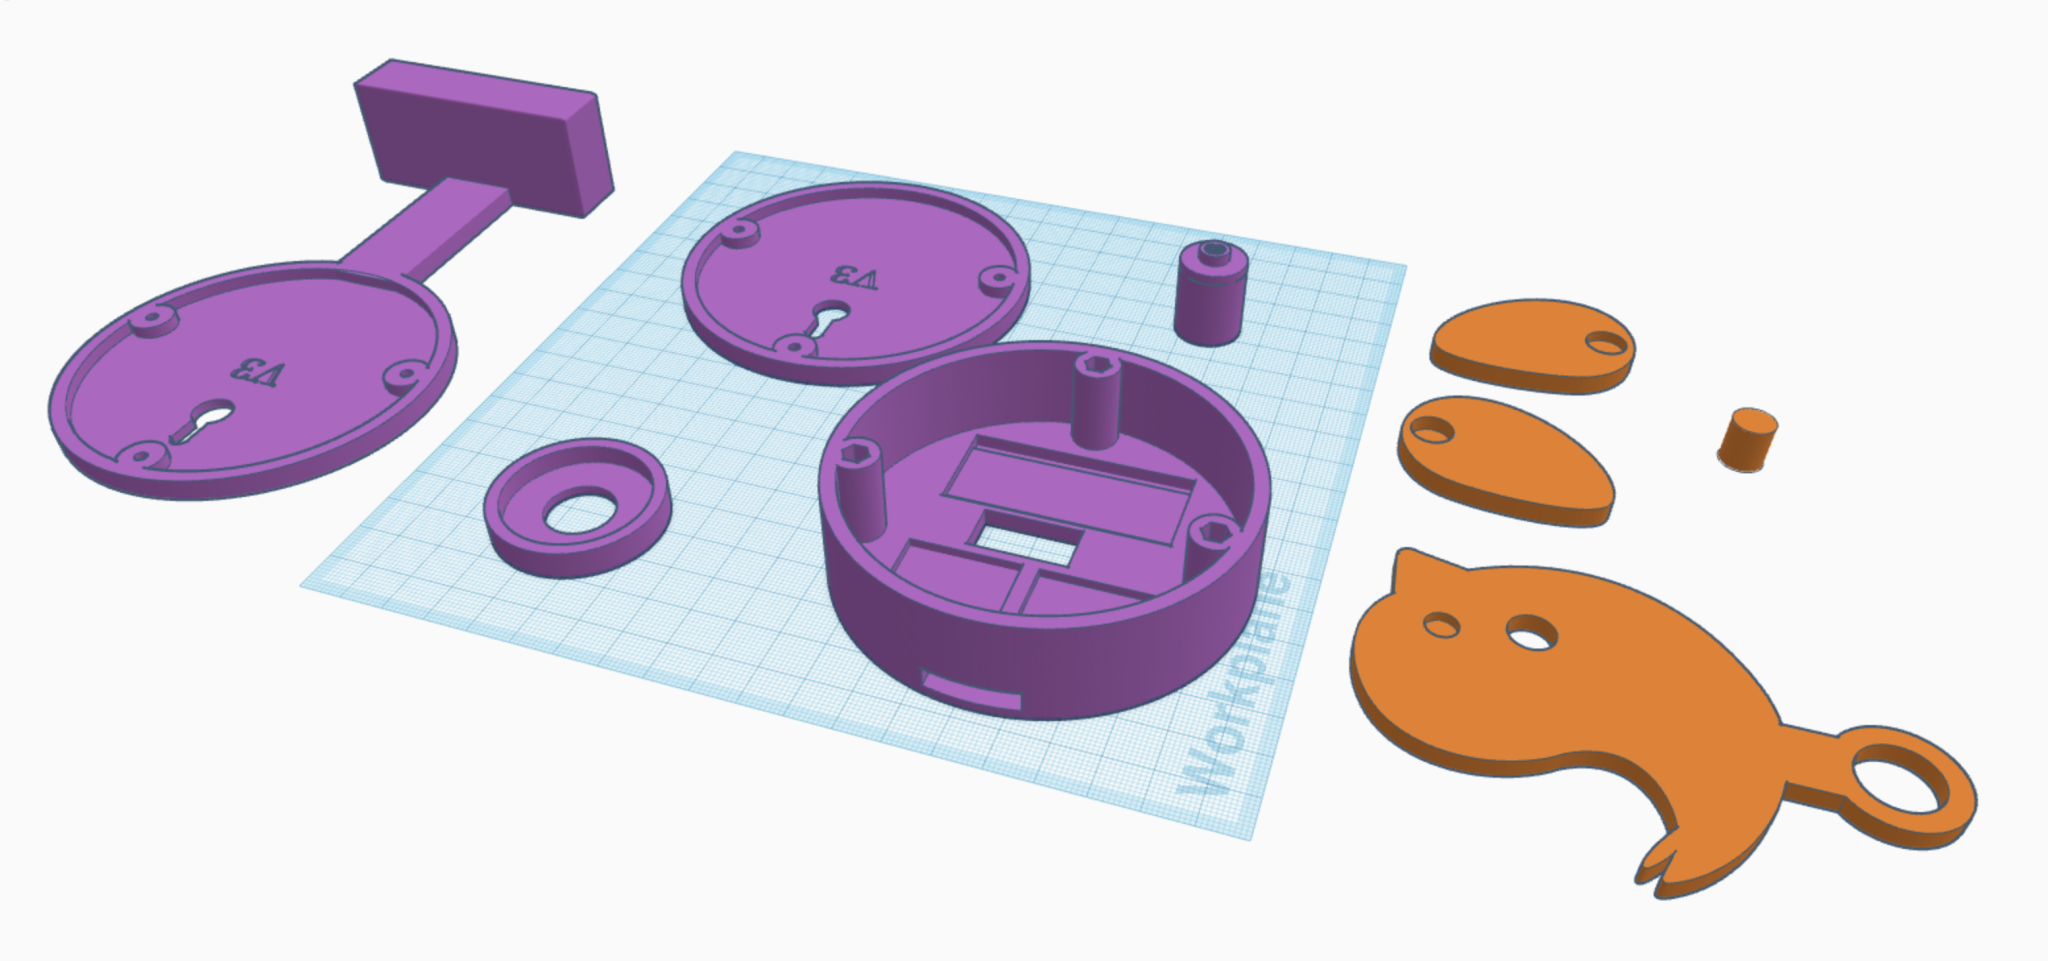
- All the 3d printed parts (you can choose which backplate you want, either with or without the stand)
- Feather format microcontroller (ideally with wifi but the basic functionality will work without!).
- SG90 Micro Servo
- Adafruit SGP40 Mox Gas Sensor (you can use an SGP30 but you’ll need to adjust code)
- Adafruit AHT20 Temp/Humidity Sensor (or a BME680)
- 2 short Stemma/Quiic connector cables
- 3 x M3 nuts and machine screws
- Adafruit USB-C breakout board
- Some silicon wire. Soldering iron, solder etc
3D Printing
The first step is to 3d print all of the parts for your Birb. Everything is oriented correctly, so just drop them into your slicer and print away. No need for fancy materials, any old PLA will do the job. For the main enclosure you may need a small amount of support material for the ventilation holes depending on your printer.

In your slicer I recommend 2 perimeters and 10% gyroid infill. There are two rear panels to pick from, one with a simple screw hole for wall mounting and another with a stand if you want it freestanding. If you pick the stand, I suggest printing with a higher level of infill to increase the weight which will improve stability.
Once the prints are done, drop the M3 nuts into the cavities on the main enclosure and secure them with a tiny amount of super glue.
Electronics
Using the Stemma cables connect the AHT20 to the SGP40 and then the SGP40 to the Microcontroller using the matching port on your board. You can manually solder them to the I2C pins on your microcontroller but using the Stemma cables makes this a lot quicker.
Use some short lengths of silicone wire to connect the positive pin on the USB-C breakout to the USB pin on your Feather and the ground pin on the USB-C breakout to the ground pin on the Feather.
Finally wire up your servo. The red wire goes to the 3V pin, brown to ground and the yellow wire goes to Pin 0 (conveniently located between the 3V and ground pins). You may want to solder up a simple splitter cable to make connecting your two ground cables to the same pin a little easier.
The Code:
Finally, before assembling The Birb, I suggest putting the code onto your Feather because the USB breakout only transfers power and so cannot be used for putting the code on your device.

Start by installing CircuitPython on your Feather. Follow the instructions for your specific board.
Once this is done you will need to copy the required libraries to the Lib folder on your Feather (if you don’t have one, don’t panic – just create one!). Depending on which version of CircuitPython you installed, you should download the appropriate libraries. From this folder you will need to drag and drop the following folders and files:
- File: adafruit_ahtx0.mpy
- Folder: adafruit_bme280
- Folder: adafruit_bus_device
- File: adafruit_dotstar.mpy
- Folder: adafruit_minimqtt
- Folder: adafruit_motor
- File: adafruit_requests.mpy
- Folder: adafruit_sgp40
Once you have done this, you’ll need to copy across the code.py and secrets.py file found at my GitHub repo onto your Feather device, then modify the secrets.py with the details of your wifi network and MQTT server. Don’t worry if you don’t have an MQTT broker, there are plenty of free online alternatives.
To test your Birb just breathe really hard on the gas sensor and you should see the bird react.
MQTT / Home Assistant
I’m going to assume that you already have HomeAssistant setup, and the Mosquito MQTT broker add-on installed and configured. From there you just need to tell HomeAssistant to recognise the MQTT and present them as entities within HomeAssistant. To do this you just need to add the following to your YAML configuration file:
mqtt:
  sensor:

    - name: "birb.status"
      unique_id: "birb_status_001"
      state_topic: "home/birb/data"
      value_template: '{{ value_json.status }}'

    - name: "birb.gas"
      unique_id: "birb_gas_001"
      state_topic: "home/birb/data"
      value_template: '{{ value_json.gas }}'
      device_class: "gas"
      state_class: "measurement"
      unit_of_measurement: "%"
      icon: "mdi:scent"

    - name: "birb.voc"
      unique_id: "birb_voc_001"
      state_topic: "home/birb/data"
      value_template: '{{ value_json.voc }}'
      unit_of_measurement: "ppb"
      device_class: "aqi"
      state_class: "measurement"
      icon: "mdi:scent"

    - name: "birb.temperature"
      unique_id: "birb_temperature_001"
      state_topic: "home/birb/data"
      value_template: '{{ value_json.temperature }}'
      unit_of_measurement: 'C'
      device_class: "temperature"
      state_class: "measurement"
      icon: "mdi:thermometer"

    - name: "birb.humidity"
      unique_id: "birb_humidity_001"
      state_topic: "home/birb/data"
      value_template: '{{ value_json.humidity }}'
      unit_of_measurement: '%'
      device_class: "humidity"
      state_class: "measurement"
      icon: "mdi:water-percent"

    - name: "birb.memory"
      unique_id: "birb_memory_001"
      state_topic: "home/birb/data"
      value_template: '{{ value_json.memory }}'
      device_class: "data_size"
      state_class: "measurement"
      unit_of_measurement: "kbit"
      icon: "mdi:memory"
Once this is done you need to reload your configuration file which can be done by rebooting HomeAssistant or using the “reload configuration” tool in the Developer Tools section of HomeAssistant.
From here, you should see six new entities in HomeAssistant. You can use these to display graphs on your LoveLace dashboards or trigger automations of your other smart home devices.
Wrap Up
Hopefully by this point you should have working electronics and all the 3d printed parts. All that is left to do is to insert the electronics into the enclosure and attach the bird to the servo using a couple of drops of super glue to hold it all together firmly. When you come to screw the lid closed be sure to watch out for the wires as it’s easy for them to get trapped between the servo and the case lid. Thats it! I hope you have fun with your Birb and please be sure to share your makes either here in the comments or on Printables!
If you liked this project, please consider buying me a coffee!
Would it be possible to update it to use Matter over Thread to communicate with Home Assistant? Just throwing it in there?
@Robert I’m pretty sure you could as long as you have the right controller. I just use ESPHome, but there is no reason you couldn’t use any other kind of Microcontroller (for example there are some new ESP boards that support Zigbee, but not sure about Matter/Thread).