
This document is a living document / work in progress.
I’m creating this document partially because I hope that one day it will be useful for others given how scattered far and wide the information about building keyboards from scratch is, but also to hold myself accountable for documenting my projects and writing more (and also to get my hands used to typing on a 40% ortholinear keyboard after a life time of staggered keyboards).
Why build my own keyboard?
Well… I’m a maker. My first ever keyboard was a Keychron K2, which I purchased at the start of lockdown, mostly because the keyboard on the 2o15 macbook pro supplied by my work is is a bag of crap and started failing on me and I’d left the wireless Magic Keyboard in the office assuming the whole virus thing would blow over in a couple of weeks. I saw it as an opportunity to improve my setup and I loved Keychrons “Mac first” and wireless approach and ran with it.
Well… big mistake. While waiting for the keyboard to arrive I did my usual routine of searching for reviews on YouTube and discovered TaeKeyboards, r/mk and a bunch of other mechanical keyboard content and promptly fell head first down the rabbit hole.
While scrolling through r/mk one day long after my K2 arrived, I saw something I had never seen before. A beautiful little 4o% keyboard with exposed PCB parts called the Romeo. It totally appealed to my inner maker, and I wanted to build one just for the fun of it. Sadly, as is often the case in the world of mechanical keyboards it was only available in group buy but while checking out the makers site, I discovered it was open source AND had a more useful, bigger brother called the Discipline which was also open source. So, after a bit of research, I ordered the PCB’s online from JLCPCB and all the other bits and bobs from various stores online, mostly Aliexpress. After about 3 months of waiting on deliveries I put that sucker together and had my new daily driver.
I MADE my own keyboard… that was awesome. But… well, I didn’t make all of it and when I discovered that you could handwire a mechanical keyboard, I knew that someone elses PCB was never going to be enough and started looking into hand wiring keyboards. I started with a little macropad but now it’s time for the big one.
I am, for better or worse. A maker. I’m making a keyboard, not because I need one, but because I love to make things and it seemed like a fun new challenge!
Why a 40% ortholinear keyboard?
This is a pretty easy one to answer – It’s easy. It’s easy to wire up being an almost perfect grid, easy to find keycaps for, easier to write firmware for etc. However, I have a really small desk, and it’s about to get smaller when my 3d printer arrives so the idea of freeing up some space with a smaller board is appealing. From here, I’ll probably move to something with a number row.
The switches
This is probably the least complicated part of building a keyboard, finding some switches. There are many group buys and limited time pre-orders in the switch world, but there are a number of brands out there that are consistently available AND good quality. I’m a huge fan of Kailh Box Heavy switches and have the Box Burnt Orange tactile switches on my Discipline 65% keyboard and the Dark Yellow on my Gherkin.
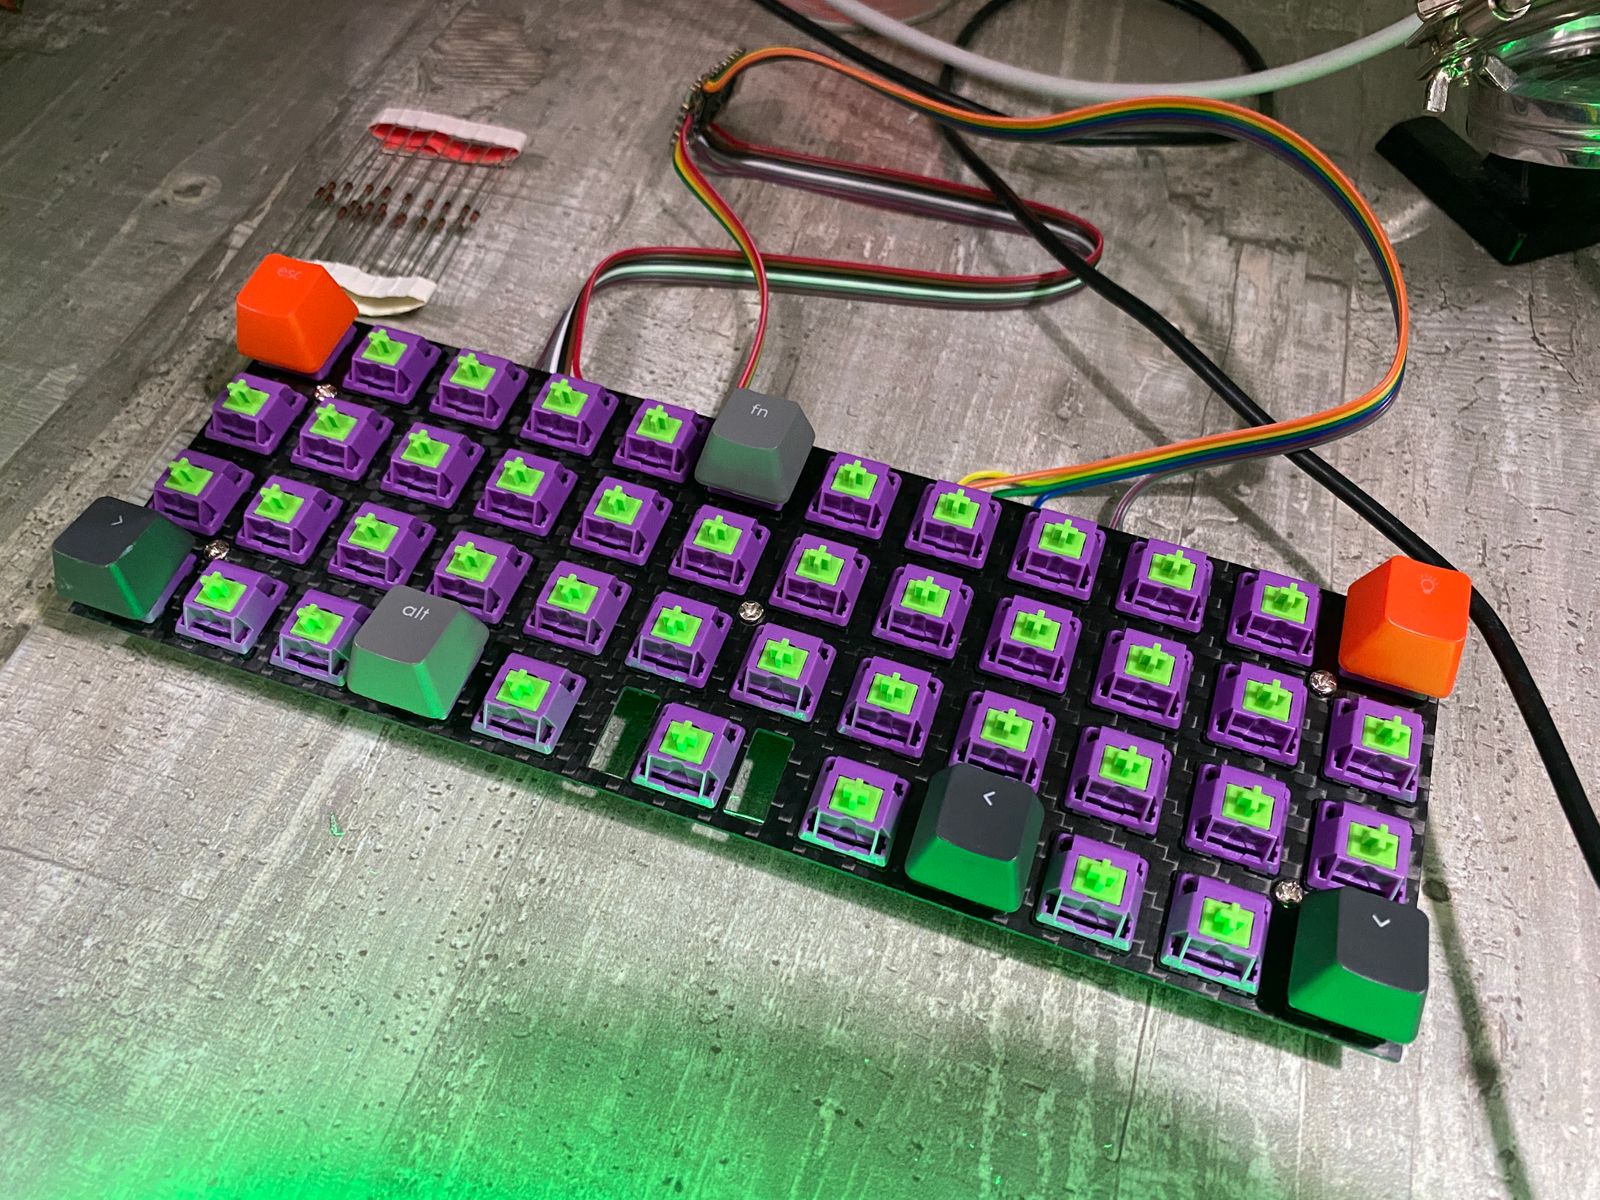
I was surprised by how much I loved the smoothness of the Dark Yellows and was all set to buy them for this build, however when visiting my favourite online mechanical keyboard store to make the purchase, I noticed they had these really cool cyber-punk looking EV-01 switches which are colour switched clones of Durock Linear switches. These switches seem to come highly regarded by the community and look super cool, so I jumped on the opportunity and grabbed them!
Don’t look, I’m naked!
They were pretty smooth on arrival but I had a batch of Krytox from a previous build and a free Friday night so I fired up a movie and lubed up the 60 switches I ordered in a single batch. Now they feel super smooth and a completely free from any spring ping.
The key caps
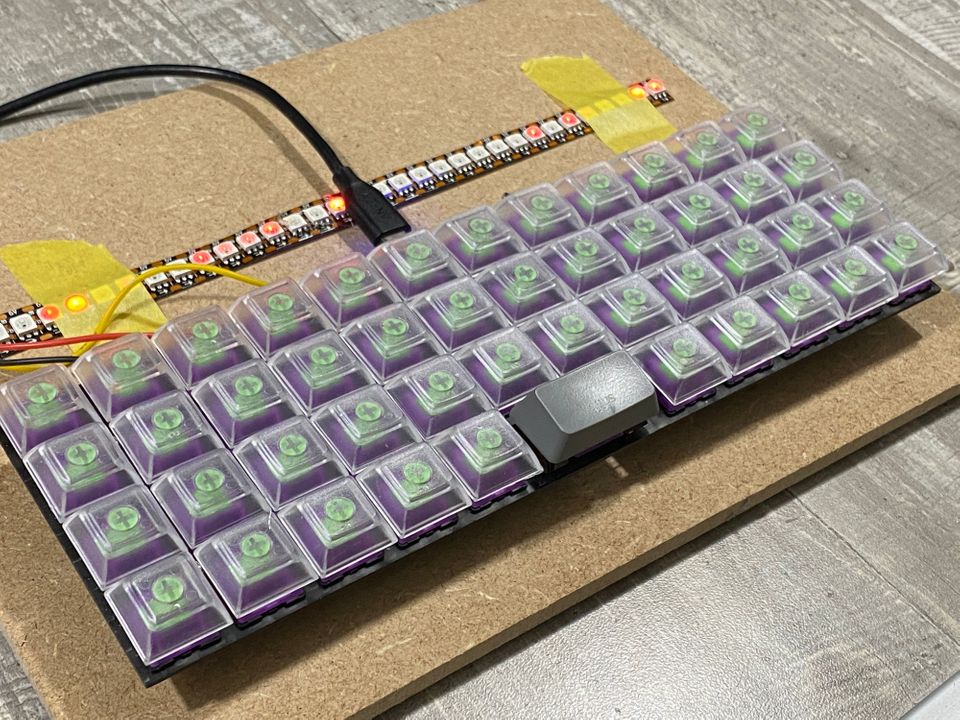
The keycap situation is being realised in three phases. Currently the board is wearing a random selection of caps from my Keychron K2. It’s not especially pretty as they’re not designed for ortho, but they’re fine for now.
Not quite a Keychron
Soon I have some transparent DSA profile PBT keycaps arriving from Aliexpress which I plan to create custom legends for using water-slide decals (and protect with some clear epoxy or something).

now wearing its lovely clear caps (but the space bar needs some work)
I’m also very much considering getting in on KAM Superuser, a terminal inspired flat profile set perfect for ortholinear keyboards. They’re very cool but given that they won’t arrive until Q1 2022 at the earliest, I needed something to tide me over until then.

This is my keymap as I plan to print on waterslide decals and add to the transparent caps
The wiring
// coming soon…
The firmware
// coming soon…
// layer choices
// talk about how my enter key is also shift
The case
// coming soon…
The verdict
// coming soon…