This past year I've become obsessed with HomeAssistant, adding numerous sensors and smart products throughout the house. Due to our underfloor heating setup having no thermostats, I had no way to monitor home temperature. Rather than purchasing battery-powered LCD displays, I decided to build smart sensors using ESPHome.
While Zigbee and Z-wave options exist, they are typically battery-powered and lack flexibility. I wanted a DIY solution that was both affordable and customisable.
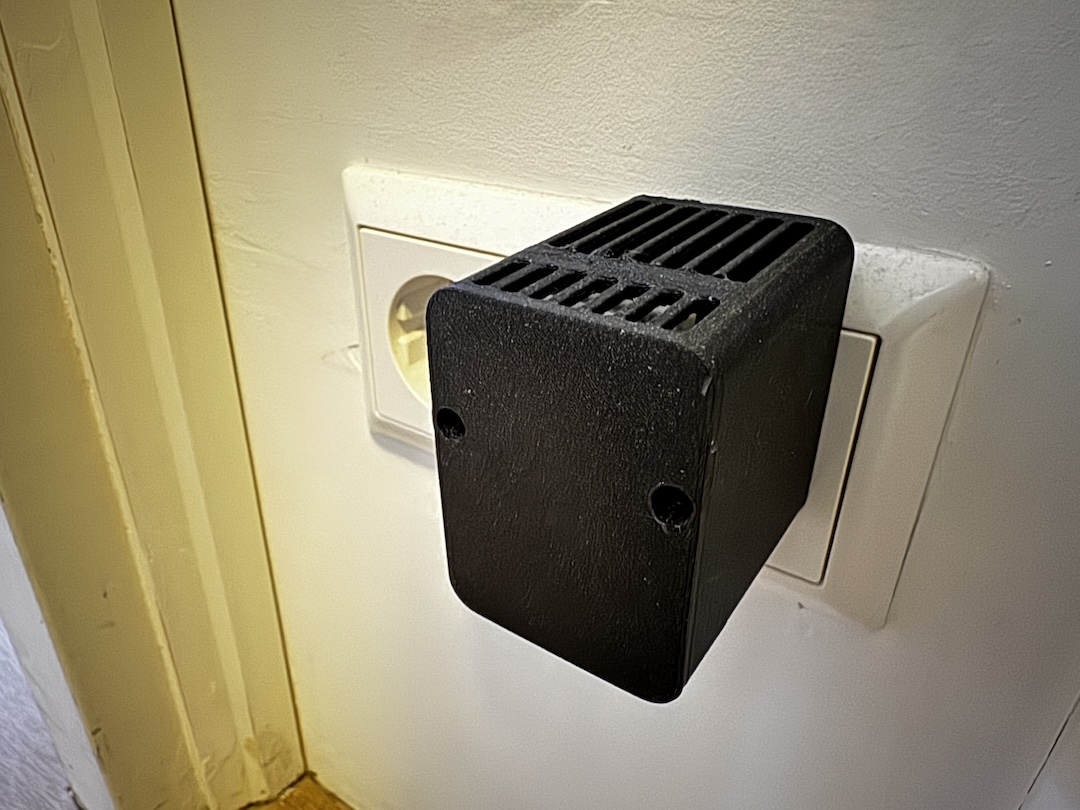
Most existing DIY solutions consist of a microcontroller with a sensor hanging off it, connected via USB to a wall adapter. While functional, these setups are not aesthetically pleasing and lack "wife approval factor." I designed a slim, 3D-printable enclosure that sits around a €2 USB phone charger, enabling creation of plug-in ESPHome devices without excessive cost or a homemade appearance.
Parts List
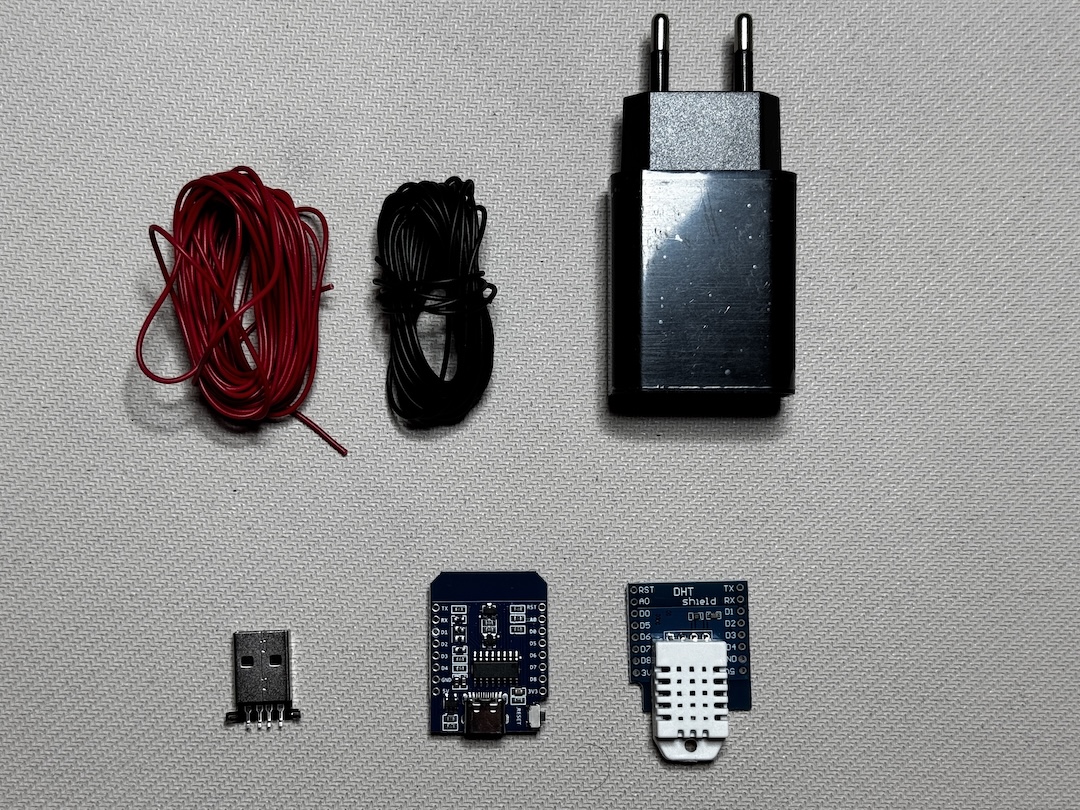
To build this project, you will need:
-
Microcontroller: Designed to accept D1 Mini format. Options include:
D1 Mini boards typically come with correctly-sized headers.
-
Sensor: A DHT22 Temperature and Humidity sensor, which comes in shield form factor for easy installation.
-
Male USB 2.0 Header: Available with exposed pins. Versions with breakout boards are costlier and less suitable for this project.
-
5V, 2A USB Charger: Standard EU mobile phone charger. This specific form factor ensures proper fit in the designed case.
-
M3 Screws: Two screws, at least 10mm long. Hex head variants are preferred for aesthetics.
-
Wire: Silicone-coated flexible wire is recommended.
-
3D Printed Parts: Available free from Printables. Print face-down with no supports recommended.
-
Soldering Iron and Solder
Note: When ordering from AliExpress, purchase spare parts as dead-on-arrival shipments have occurred.
How to Build
-
Solder male headers to your microcontroller. Using a breadboard holds components in place. For multiple units, solder only essential pins: 5V, GND, 3V, TX/RST for stability. Position pins on the ESP module side with USB port facing outward.
-
Solder female headers to the DHT22 shield ensuring the white sensor module faces outward. Mount female pins on the ESP module, place the sensor on top, then solder in place (essential pins only).
-
Trim wires to length (40mm is adequate), strip 2mm from ends, twist until tidy, and tin with solder.
-
Tin the positive and ground pins on the USB plug (the outermost of four central pins). Middle pins can be trimmed since data transmission is unnecessary.
-
Solder the positive wire to the positive pin on the USB header (rightmost pin when oriented as shown in photos). Solder ground wire to the ground pin.
-
Solder wire ends to the 5V and GND header pins on the ESP board, avoiding other components.
-
Check all connections are secure.
Testing
Plug the USB connector into your USB charger and insert into a wall outlet. The ESP device's status light should blink briefly if assembly was successful. Unplug from the wall and connect to your computer using a data-capable USB cable.
ESPHome Configuration
-
Provision the device using the ESPHome Web Flasher in a Chromium-based browser and connect to WiFi.
-
In the ESPHome Compiler, click "add new device" and follow the instructions. Your device should appear in ESPHome.
-
Click edit and paste the code below after the
captive_portalline in your device configuration file, then save and upload to your ESP device.
# To have a "next url" for improv serial
web_server:

# DHT22 Sensor configuration
sensor:
  - platform: dht
    id: dh222_sensor
    pin: GPIO2
    model: DHT22
    temperature:
      id: temperature_sensor
      name: "Temperature"
      unit_of_measurement: "°C"
      accuracy_decimals: 1
      filters:
        - offset: 0
        - lambda: "return x + id(temperature_offset_ui).state;"
    humidity:
      name: "Humidity"
      id: humidity_sensor
      unit_of_measurement: "%"
      accuracy_decimals: 1
      filters:
        - offset: 0
        - lambda: "return x + id(humidity_offset_ui).state;"
    update_interval: 20s

number:
  - platform: template
    name: "Temperature Offset"
    id: temperature_offset_ui
    unit_of_measurement: "°C"
    min_value: -20
    max_value: 20
    step: 0.1
    mode: box
    update_interval: never
    optimistic: true
    restore_value: true
    initial_value: 0
    icon: "mdi:thermometer"
    entity_category: config
    on_value:
      - lambda: 'id(dh222_sensor).update();'

  - platform: template
    name: "Humidity Offset"
    id: humidity_offset_ui
    unit_of_measurement: "%"
    min_value: -50
    max_value: 50
    step: 0.1
    mode: box
    update_interval: never
    optimistic: true
    restore_value: true
    initial_value: 0
    icon: "mdi:water-percent"
    entity_category: config
    on_value:
      - lambda: 'id(dh222_sensor).update();'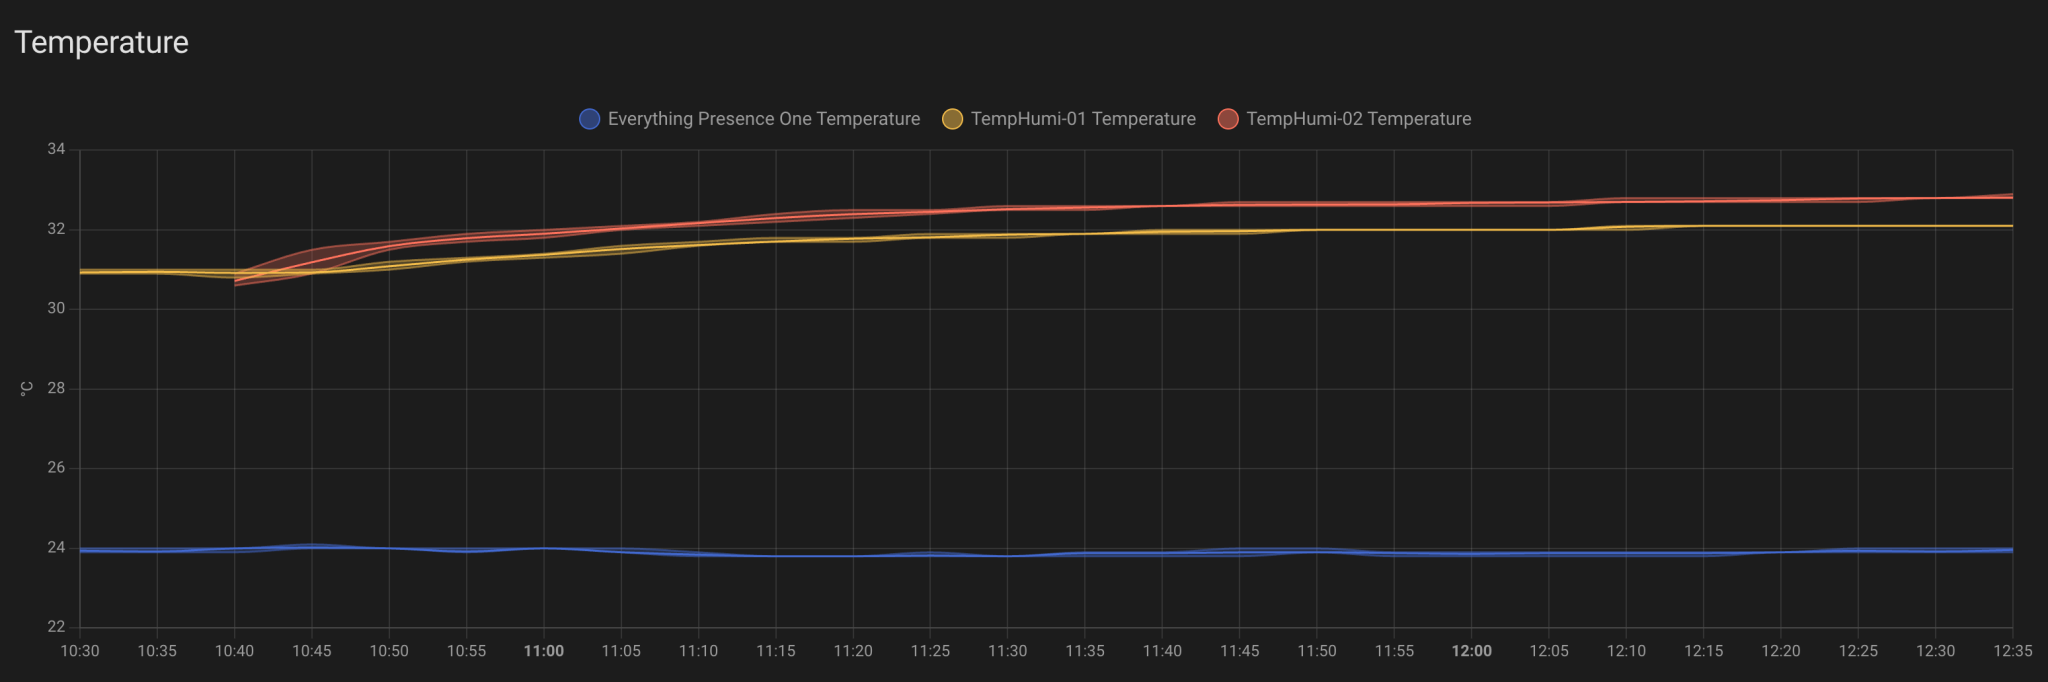
The configuration includes offset options for temperature and humidity sensors, allowing calibration to compensate for sensor inaccuracy and heat generated by the ESP module.
Final Assembly
Slide the enclosure over your 5V USB plug (the slightly tapered plug only fits from one end) and press-fit into place. For additional security, apply glue. Connect the microcontroller, screw the case together, and add to your HomeAssistant devices. Auto-discovery should work in most circumstances.
Other Uses for This Setup
The deliberately flexible design accommodates various sensor types and applications:
- mmWave sensor for presence detection
- Bluetooth proxy for mobile-based presence detection or as a Bluetooth repeater for HomeAssistant
- RGB LEDs as visual notification indicators
- Advanced gas sensors such as the BME680 to monitor air quality
- IR receiver to accept remote commands and relay to other smart home devices
- Buzzer configured as a doorbell chime
Closing Words
Building this project satisfied a long-standing desire to create customisable smart home solutions. If you build one of these devices, please share your make on Printables. Doing so earns points redeemable for filament, enabling future cool projects.
Good luck and happy making!